There’s a lot that goes into hosting a successful gender reveal party. You’ll need invitations, balloons, a perfectly decorated cake, food, and drinks all displayed in your pink and blue theme.
The perfect pink and blue gender reveal party starts with the perfect pink and blue gender reveal invitation. Artful Life Designs latest pink and blue smoke gender reveal invitation templates make this first step so simple.
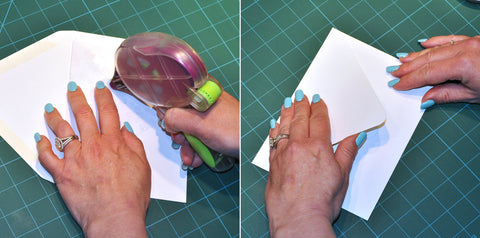
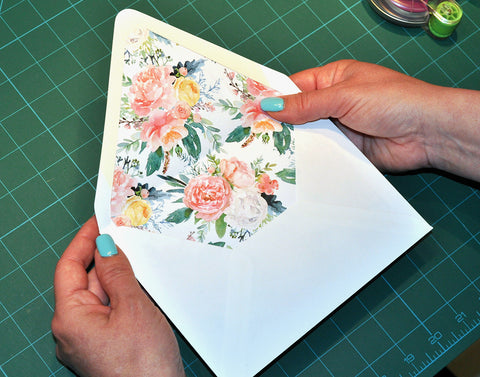
A Books for Baby card is a bonus, included with your invitation template purchase. All our templates are easy to edit online at templett.com. No software or fonts to download, just login, edit, download and print! To help complete your pink and blue gender reveal, choose from a variety of matching printables.
A How-To Guide in PDF form is included with your self-edit template purchase from Artful Life Designs. We’ve also created a Quick Start Guide video tutorial to make the editing process as easy as possible for our customers. Our template designs are great for DIYers! Just purchase, edit, download and print!
If you have template editing basics mastered and would like to learn more advanced editing techniques using Templett, check out our other video tutorials:
Today we're using one of our envelope liner printables to show you step-by-step how to create beautifully lined envelopes.
Each Artful Life envelope liner printable includes liners for several envelope sizes: A7.5-Euro Flap, A7-Euro and Square Flaps, A2-Euro and Square Flaps, and A1-Euro and Square Flaps.
We also include a bonus full sheet you can use for making your own templates if you have an unusual shape or size envelope.
MATERIALS:
Artful Life Designs Floral A7 Envelope Liners Euro Flap and Square Flap
Step 1 Print your liners using the Artful Life Designs printable PDF of your choice to match your size and style envelopes.
Step 2 Cut with X-actor and ruler. Then trim curved edge with scissors.
Step 3 Insert liner into envelope aligning top edge of liner to the glue edge on the envelope flap. (You don't want the liner to cover the glue.)
Step 4 Carefully fold the envelope flap down, keeping the liner in place as you fold.
Step 5 Lift the flap up, but keep the liner folded down.
Step 6 Using the adhesive tape dispenser to put a strip of adhesive along the top edge of the liner.
Tip: I highly recommend a glue tape dispenser if you have a lot of envelopes to do. I used the Glue Glider Pro that I purchased at my local craft shop. The strip of adhesive is about 1/4" wide which works very well when doing envelope liners.
Step 7 Make sure the liner is still in the correct position and carefully fold the envelope flap closed, pressing it firmly onto the liner.
Open the flap to see your lovely envelope liner perfectly in place! Now you're ready to stuff, seal, stamp and mail!
Browse envelope liners and other wedding extras. All Templates and Printables are Buy 3, Get 40% Off! Shop Now!
]]>Download the set using this link: Free Printable Halloween Bingo Cards
This Halloween Bingo Printable is a 13 page PDF file. Print at home or take to any local copy shop for printing. Then enjoy hours of scary fun!
HOW TO PLAY:
This is slightly different that traditional Bingo, but super easy to play. Cut out the 24 individual calling cards and put them in a bag or container (a witch’s hat would be cute). Have plenty of M & Ms, Candy Corn or Smarties for players to mark their cards. The Caller pulls a card out of the container, calling out what is on the card & showing the card for players to see. Players check their Bingo Card for a matching picture. If they have a match, they cover that spot with a piece of candy. Continue pulling out calling cards one at a time until someone gets five in a row, either horizontally or vertically. That person calls “Bingo” and is the winner.
PLANNING A HALLOWEEN PARTY?
This Free Halloween Bingo Game coordinates perfectly with our Halloween Party Printables Set which includes just about everything you need to decorate for the perfect Halloween Party.
Here’s a link to purchase and download:
Halloween Party Printable Set
We’d love to know how you and your family enjoy our Halloween Bingo Game. Feel free to leave a comment!
You have several printing options which you can read about in our tutorial: How To Print Your Wedding Signs and Stationery, but before you print, you need to select the paper that best meets your needs and style.
If you’re printing at home, it’s essential that you select a paper that is compatible with your printer. For signs that you’ll frame or mount, 65-100 lb cover (card stock) will work fine. For other stationery, such as flat invitations, programs or menus, 100-130 lb cover will work well. 65-80 lb. cover can be used for folded invitations or programs. NOTE: If you decide to use paper over 110 lb. cover, you may have problems with it feeding through your printer, so checking compatibility first is very important!
You may find a paper with a weight listed as “PT” (such as 16 PT). Most business cards are printed on 14 or 16 PT paper to give you an idea of weight. 18 PT is extra heavy paper and probably not a great choice.
Paper finish is also a big consideration. Uncoated cotton paper generally takes ink very well. A smooth, coated paper can give a more elegant look, but may not work with all printers.
If you use a copy shop, contact them ahead to find out what paper types and weights they offer or can accept from you. Using heavier weight paper for invitations could also change the amount of postage needed, so keep that in mind when selecting paper. Your copy shop should be able to show you paper samples they have available, but will usually let you supply your own paper if you wish.
One of our favorite papers is Staples 110 lb. white, 92 bright, card stock. You can purchase 250 letter size sheets for under $20, so it’s also economical.
For a rustic look, brown Kraft paper is a great choice. If you're looking for specialty papers or colors, check out our online resource links below.
PAPER RESOURCES
Whatever your style, get paper samples first to ensure the paper you choose will work with your printer and yield the results you want. Choosing the right paper will ensure your wedding signs and stationery are perfect for your special day!
For more information, please read our FAQs, stop by our Tutorials Page or Contact Us with questions!
]]>Once you've purchased your program fan template, edited and downloaded it using our online software at Templett.com, you're ready to print and assemble your program fans.
You can easily print your program fans at home, a copy center or print shop. Read our tutorial How To Print Your Wedding Signs And Stationery for more info. You’ll want to use a heavy cardstock. 65 - 100 lb will work well for a program fan. Our Paper Selection Tutorial offers some great resources for helping you find and select the right paper.
For a more rustic look, you can use brown Kraft paper.
Fold the printed fan in half using the center marks as a guide.
Use a bone creaser, ruler, craft stick, or any similar item that will help you get a sharp crease. I used one of my wooden fan paddles and it worked great!
Your fan will be easier to cut if you fold it first. Use a paper cutter for best results.
Trimming your fan while it’s folded gives a really clean and even edge. If you don't have access to a paper cutter, you can use an X-Acto blade and cutting mat.
Use glue tape or a glue stick around the edges and in the center where you’ll place the paddle stick. Make sure you get it close to the edges all around.
NOTE: I tried Glue Tape, Glue Dots and Glue Sticks and they all worked well. You may want to experiment with a few options to see which you like the best.
Place the paddle stick so about half of it extends below the bottom of the program fans. My paddles were 8 inches long, so I marked the inside of my programs 4 inches up from the bottom. This doesn’t have to be exact and after doing a few, you could probably just eyeball it!
Once you have your paddle in place, fold the fan shut, pressing firmly all around to stick it tight.
If you prefer round corners, use a corner punch, which you can find at your local craft store. A ribbon tied onto the handle is also a lovely accent. We cut our ribbon about 18 inches long and tied it where the paddle met the bottom of the fan.
Here's a view of one program fan from the back. So cute from both sides!
Artful Life Designs offers a variety of inexpensive and easy-to-use DIY Wedding Programs, Wedding Signs and Wedding Stationery. All Templates and Printables are BUY 3, GET 40% OFF, so buy a bundle and SAVE!
We also have many helpful tutorials for DIY Brides and Grooms! For more information, please read our FAQs page or Contact Us with any questions!
]]>For best results, use Adobe Reader to view and print PDF files. If you don’t have Adobe Reader installed on your PC or MAC, you can download it free from Adobe HERE. All ready-to-print PDF files have crop marks to help make trimming your signs or stationery easy. JPG files are non-editable, ready-to-print with no crop marks. Open JPG files with your default JPG file viewer.
NOTE: If you're printing one of our designs edited in the TEMPLETT web app, you'll have a few options to download your file for printing once you're finished with editing. You'll be able to save as either a PDF or a JPG.
We recommend high quality 80-110 lb. card stock to print your signs & stationery. Check to ensure your home printer or copy shop can handle your chosen paper weight before purchasing a large quantity of paper. Read this helpful article on Paper Selection for more information.
A Print Release is on the last page of Instructions or Read Me files, which came with your purchase (if required by the copy shop or photo lab).
The easiest way to trim your wedding signs and stationery is with a paper cutter. It will be much quicker and yield more professional results. If you don’t have a paper cutter at your disposal, you can also use an X-acto blade and a cutting mat. If you are having your signs and stationery printed at a copy shop, they will probably trim your prints for a small fee.
If you have other questions, stop by our FAQ page or Contact Us and we’ll be happy to help!
]]>NOTE: These instructions are NOT for our editable templates, which are accessible online at Templett.com. If you have purchased one of our editable templates, you will receive a link via email from Templett.com to login and edit your file(s) online with the templett web app. Instructions will be attached to your order that you can download from your Artful Life account immediately after purchase.
After you place your order and payment processing is complete, you’ll be taken to a page with a link to download your file(s). Your digital purchases can also be accessed any time by logging in then going to My Account > Purchases, located in the upper left corner of the screen.
Click on the link: My Downloadable Files on the right side of the page to find download links to all of your digital purchases.
You can find links to other helpful tutorials such as editing Templates and Printing Tips on our Tutorials Page. If you have any questions or download issue, please Contact Us! We’re here to help!
]]>An Artful Life Designs Baptism Print makes the perfect Goddaughter or Godson gift every Godparent will be happy to give. We offer several printing options for our baptism and christening designs.
Choose from 8 x 10” or 11 x 14” archival matte paper prints, gallery wrapped canvas prints, or digital files you can print at home or at a local print shop. No matter which size or printing option you choose, we will personalize the design to create a unique baptism gift or christening gift for your special child.
Go to Baptism and Christening Gifts to order your personalized keepsake print from Artful Life Designs.
]]>